I am sending out our Super Summer Swap packages today! Super Summer swap is hosted by Life of a Dairy Queen and Christy from Superheroes and Princess.
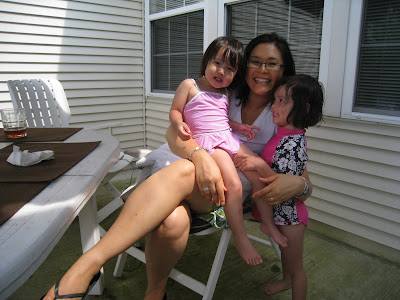
What I love about this swap is that my girls were matched up with girls close in age. Emme was matched up with a little girl in Texas and Lulu was matched up with a little girl in Alaska.
Look at the great package Emme received from the little girl in Texas. Emme was so excited! We'll post what we sent after they receive their packages.
Gumball Machines
Emme was wearing her favorite shirt today. She calls it her bubble shirt. Since she loves the shirt so much and we are currently trying to teach her her colors...I thought why not use something she loves to reinforce teaching her colors.
Having just used contact paper in the fish bowl project I knew this would be a simple way to execute the gum ball machine.
As she placed the bubbles on the contact paper I asked her what color they were. I helped her with the colors she didn't know. We will hang this where we can review the colors with her. Lulu wanted to get in on the action so she made a red one.
Emme protested having her picture being taken...you can see the inspiration for the project behind the sass!
Supplies: contact paper, construction paper in various colors, scissors, & glue
Measure out your contact paper by using a medium size bowl for your circle. Make sure 2 of your circles fit across the contact paper if you plan on folding in half. If you are making a large one (would be cute for a classroom) plan on cutting out 2 large pieces. Cut out your bubble gum circles. Use a bottle cap as a template if you need to. Cut out your base and top. You could add numbers to the bubble gum circles to extend the learning.
Tip: cover the half you will be folding over with the contact paper backing you already peeled off. This way your child will have a better sense of where they should place their bubble gum circles.
After your bubbles are sealed into the contact paper - trace a circle using a permanent marker. Cut out.
Again, Emme, refused to join in the picture...it has been one of those days. At least she had fun making it and was very angry to have it taken away from her for this photo. As you can imagine, it was quickly returned to her!
Eye Spy Bottle
I finally got around to making the photo cards that goto our eye spy bottle. I confiscate all the small objects that come in some of the girls toys. Originally it was for choking hazard and now it is because they end up everywhere or in the vacuum bag. I photographed them and printed them out on card stock and then laminated them with contact paper. Punched a hole and looped them together. (You'll notice I need more rice for the bottle.) Edit: I try to subtly reinforce teaching color by grouping similar colored objects together.
Tip: glue the lid onto the bottle...unless you want to find the contents of your eye spy bottle all over your floor.
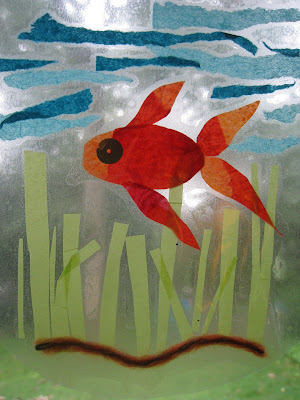
Fish Bowl Craft
The Fish Bowls use Contact Paper, Tissue Paper, Sequins (optional) and yarn.
I kept the shapes very basic (circle, triangle and rectangle) for the first fish bowl. Older children can go beyond the basic shapes and add their own touches maybe adding a treasure chest or some shells.
Tip: Have everything ready to go before sitting your little one down to assemble their fish bowl. Older children can create as they go. Toddlers will need everything cut and ready to go.
- Start with a rectangle of contact paper.
- If you need to help you and your little one visualize the shape of the bowl. Draw a fish bowl on paper and slip it behind the contact paper.
- Place items on contact paper.
- Take a second piece of contact paper and lay on top.
- Rub to seal.
- Cut out fish bowl shape.
- Punch hole and add yarn or ribbon to hand.
Afterwards, Lu just wanted to make a collage.
Watercolor Thank You Cards
The Crafty Crow featured a blog called Inspireco on her What Girls Are Made of post. Inspireco showcased a simple technique for recreating those Just Add Water watercolor books you remember from your childhood. I thought I would give it a shot for Em's Thank You cards. Her birthday is coming up in August.
I drew a picture of Elmo on a folded piece of card stock with a Sharpie. Inspireco recommends you use water color paper - I did not have any - more on that later. You can also print your image onto watercolor paper. Cool!
Color in using watercolor pencils. You do not have to color the entire picture in. Inspireco instructs you to color around the edges. It looked weird when I did that so I colored in the entire picture very roughly.
Paint with water. This is where the watercolor paper comes in handy. The card stock buckled and didn't look so hot. Plus all the colors got muddy from my coloring in the picture too much. I can't believe I momentarily forgot my kiddos were not going to paint in neat little sections.
The girls were absolutely thrilled by them and the whole painting water and seeing what happened process. I don't love how they came out but have to suppress my need for them to be perfect. In the end I am glad I tried the technique and may revisit this again with some watercolor paper.
Sunday Snapshot
Stop by Katie's Nesting Spot to enter her Ni Hao Kai-lan Great Trip to China DVD giveaway. Plus read an excellent and detailed review of the show from an educators point of view. Giveawy ends July 31st.
Letter Exchange: Canada & Germany
Lu just loved the letter we received from Canada! It was chock full of artwork! Lu especially liked the drawing of the dinosaur and volcano! She even got a princess coloring page! I think she may have found a kindred spirit! This little girl likes Dinosaurs and Princesses! Pretty cool!
The next letter came from good friends of ours who moved back to Germany last year. Lulu doesn't remember her little friend but loved looking at the wonderful postcards he sent. His mom wrote on the back of each telling us about the pictures.
We have received so many wonderful letters and drawing that I have placed them in a simple three ring binder for Lu and Em to look through. We will use this as a tool later when we begin to look at each state / country a little closer.
A nice bonus to the letter writing is Lu has taken a fancy to collecting stamps. No big surprise from my little collector!
Cupcake Liner Fish
I bought these vibrant cupcake liners for the bright red liners (...yes, I've got Elmo on the brain.) I loved the other colors it came with and immediately thought fish...well mermaid...but that was too involved. See picture at bottom.
The great thing about this craft is that you can have children at varying skill levels create a simple or complex fish.
One cupcake liner. Cut out center circle. Cut up outside paper into chunks following the ridge lines. Glue down circle. Glue down fins and tail. Glue on googly eye. Bubbles were made with a bit of glue and glitter.
Three cupcake liners. One flattened for the body. Cut slit for mouth. Glue down. Cut another liner into quarters. Cut into liner following ridge but do not cut all the way through. Arrange for tail. Glue down. Last liner is used for fins. You can use the extra bit of the last liner to fill in tail. Glue down googly eye. Lu wanted to glue on sequins so our fish is very fancy.
The Rainbow Fish is similar to this fish except that I layered fish scales onto the body and used the scales for the tail. I used a aluminum foil scale to make hm look like Rainbow Fish.
Here is our mermaid. I tell you Lu likes to bling up everything! Give that girl some glitter and glue and she'll cover your cat in glitter if your not watching!
Grown In My Heart: Panda Party Favor
Come on over and visit me at Grown In My Heart. Today I show you how to make the cutest party favors. I give you the basic technique and then you can tweak it to extend your theme.
Scroll down to see the Panda Party Favor and a variation I made for Emme's birthday.
Don't forget to leave me some comment love over at Grown In My Heart! Thanks :-)
Using the same technique I made these Elmo party favors for Em's birthday. I used little boxes of goldfish since Elmo has a pet goldfish, Dorothy.
Finished Treasure Box
We finally finished our treasure box. It instantly got turned into a My Pretty Pony carrying case and stage. According to Lu the ponies love to perform -- so there you go.
I glue gunned a ribbon onto the flap as the closure. I had some magnetic backing from a cheap refrigerator frame that the plastic ripped. I glued a strip of it onto the ribbon and then a strip onto the top of the box. A simple magnetic closure. Easy for a toddler to open and close. I left about a half an inch of ribbon over hang to make it easier for little hands to grab hold of the ribbon. See picture.
To see the original post click here.
It is hard to believe this box started out looking like this.
Clover Collage
Here is a fun summer activity for all ages! It comes from a post I saw over at Valerie's blog The Frugal Family Fun Blog. Which is always full of great activities!
FFFB used a very ingenious lint roller for collecting the clovers. We did not have one on hand. Instead I affixed a piece of clear contact paper to two large Popsicle sticks. Let the girls collect their clovers and then covered with another piece of contact paper. Even Lu & Em's 9 year old cousin had fun making her one.
Valerie also suggested making a placemat or even a bracelet with your clover collage!
Thanks Valerie for another great idea!
Picnic Talk: Your Child's Imagination
Love this weeks Picnic Talk topic over at ABC & 123.
Picnic Talk: Your Child's Imagination
Ingredients for great imaginative play:
A boat full of open ended toys & props (see following list)
Lots of silliness
A pinch of modeling & suggesting (to get things started! Some kids will need a jumping off point.)
Mix in a child's natural creativity & imagination
Some of our favorite toys & props:
Dress Up Clothes
Card Board Boxes
Large Card Board Blocks
Wooden Blocks
Household Props (Sheets for making a fort, chairs, tables, pillows, plastic bowls...you name it!)
Dolls, Stuffed Animals,Ponies, Critters & Fairies
Kitchen set
Doctors kit
Tiny toy cars
Paper Plate Dinosaurs
I saw this cute Brontosaurus on Kids Craft Weekly.
We used a couple of small paper plates and instead of brushes I had Lu use a piece of an old sponge to sponge on the paint. She used a plastic fork to add some texture by scratching into the wet paint. Plus lots of glitter and sequins to dress them up! Lu thought the Brontosaurus was lonely so we made a friendly T-Rex for her to play with.
You can sign up at Kids Craft Weekly to receive a weekly email with several toddler friendly crafts or just visit the site.
The Summer Slide
Subscribe to:
Posts (Atom)