Showing posts with label Mother's Day Ideas. Show all posts

Doing Art Together: Family Hand Portrait

Pin It


This was a homework assignment for Lu. She had to count everyone in the families hands then trace their fingers on a page and number them.  I thought it would be fun to take it a step further.  I had Lu use watercolor paper. She traced every ones hands, overlapping each hand as she went along. I traced them with a Sharpie and Lu numbered them. Then I gave her some watercolors and let her paint them any way she wanted. I think it came out beautiful! What a great family "portrait." I am definitely framing this one!

This would make a great gift for a Mom, Dad or Grandparent!

Tip: I highly recommend you use water color paper. Water color paper won't buckle as much and will hold up better. Also outlining the hands using a permanent marker will make sure the hands don't get lost under all the paint.  You don't need to have your little one number each finger unless you want to reinforce counting.

Make A Beaded Eye Glass Holder


Here is a simple craft for children ages 5+ and who enjoy beading. Kids can make a pretty beaded eye glass holder for a special Grandma or Teacher!


How To Make A Quick Clay Heart


I showed my girls how to make clay hearts the other day. Lu (5 years old) was able to make them on her own after some hands on guidance. I think the ideal ages would be 6+. It is so simple I almost didn't post it! I figured, the simplest route is often the last one we try. So to save you some time....

You may ask yourself, why not use a cookie cutter? Well these little hearts are smaller than a cookie cutter and more rounded looking. They would make cute magnets or charms. Plus there is something satisfying molding something with your hands.


Roll some clay, model magic or salt dough into a small ball.


Flatten slightly with your palm or fingers. Not too much!


Squeeze one side, using your thumb and pointer, to create end of heart.


Snip with scissors the top part of heart.


Using your pointer finger, nudge the two piece apart. Round the top of each side by patting gently with your finger. 


You can keep it like that or SQUISH it with your palm. This was my girls favorite part. Let dry and then glue magnet to back for a special Valentine's gift. 
If making a charm poke a hole into clay before drying. Make sure hole is big enough to fit your yarn or ribbon. Also don't place too close to edge.

Mother's Day Ideas: Card Board MOM Sign


This is a project for older children. I should think with an adults help an eight year old could manage this. I left the cardboard unpainted but you could spray paint it.

cereal box
paper cutter or scissors
glue gun

cut box into 7 one inch strips


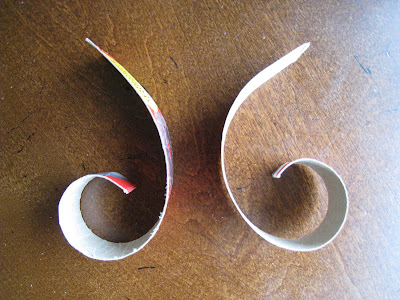
curl 4 strips - start by running your fingers along the length of the strip several times - pulling up as you go. This will make it easier to then wrap the strip around your finger to curl.

To make a M: start with 2 curled strips

One strip folded in half to form a V. Notice the two ends are folded.

You will be gluing these items together. You will also be gluing a piece of ribbon to the top of one of the M's points.

Like so:

Place a bead of glue in fold of bottom point. See picture. This gives your M more rigidity. When your done gluing it should look like this. Repeat to make 2nd M.

To make the Heart O: Fold one strip in half and curl like so. Glue at base of V. This piece will be called part A.

This is the tricky part...well simple to do but hard to explain. Glue the two M's together mid curl. See photo. Leaving approx an inch or more to create a V which will be the base of the Heart. Glue part A to the V. See picture.

When you are finished it will be fairly sturdy. I think this came out so cute. It seems like it has a lot of steps but it isn't as hard as it looks. If you have middle school kids - I think they would have fun doing this and then probably wanting to figure out how to do their own name.

Here is a variation:

Have fun crafting with your kids! Mama King

Mother's Day Ideas: Model Magic Necklaces


Here we used Model Magic to make beads for a beautiful (Grand)Mother's Day necklace. Model Magic is very light weight so the beads are not heavy like clay.

Roll the Model Magic into small balls. Poke onto skewer. Reshape if squished by process. Move skewer around to make hole large enough to thread later. You can use skewer to make dents on the beads too. Let dry.

We just used markers to decorate our beads. Polks Dots seemed to be easiest and fast. The Model Magic is still somewhat soft so just put the marker tip to the bead and lightly press for a perfect dot. Remember to decorate outside edge because that is what will be showing.

String onto ribbon or yarn. We used a piece of packing tape wrapped around the ribbon to create a stiff end (needle) for threading.

Have fun crafting with your kids! Mama King

LinkWithin

LinkWithin Related Stories Widget for Blogs