Showing posts with label Craft. Show all posts

Wet Felted Rocks

We are totally felt crazy here at the 4 Crazy Kings.

We have made felted soap, ornaments, beads, art pieces, fairy crowns, flower barrettes, and change purses. Quickly running out of things to felt we heard you could wet felt a rock. A rock? You might be asking yourself why? Well, with summer almost here we have been eating outside almost every night. We found a small felted rock makes the perfect napkin weight.  A larger rock makes an excellent doorstop.  We even made a few "hamster" rocks for the kids friends.  They have actually been a big hit. Who knows, maybe we could single handily bring back the pet rock!
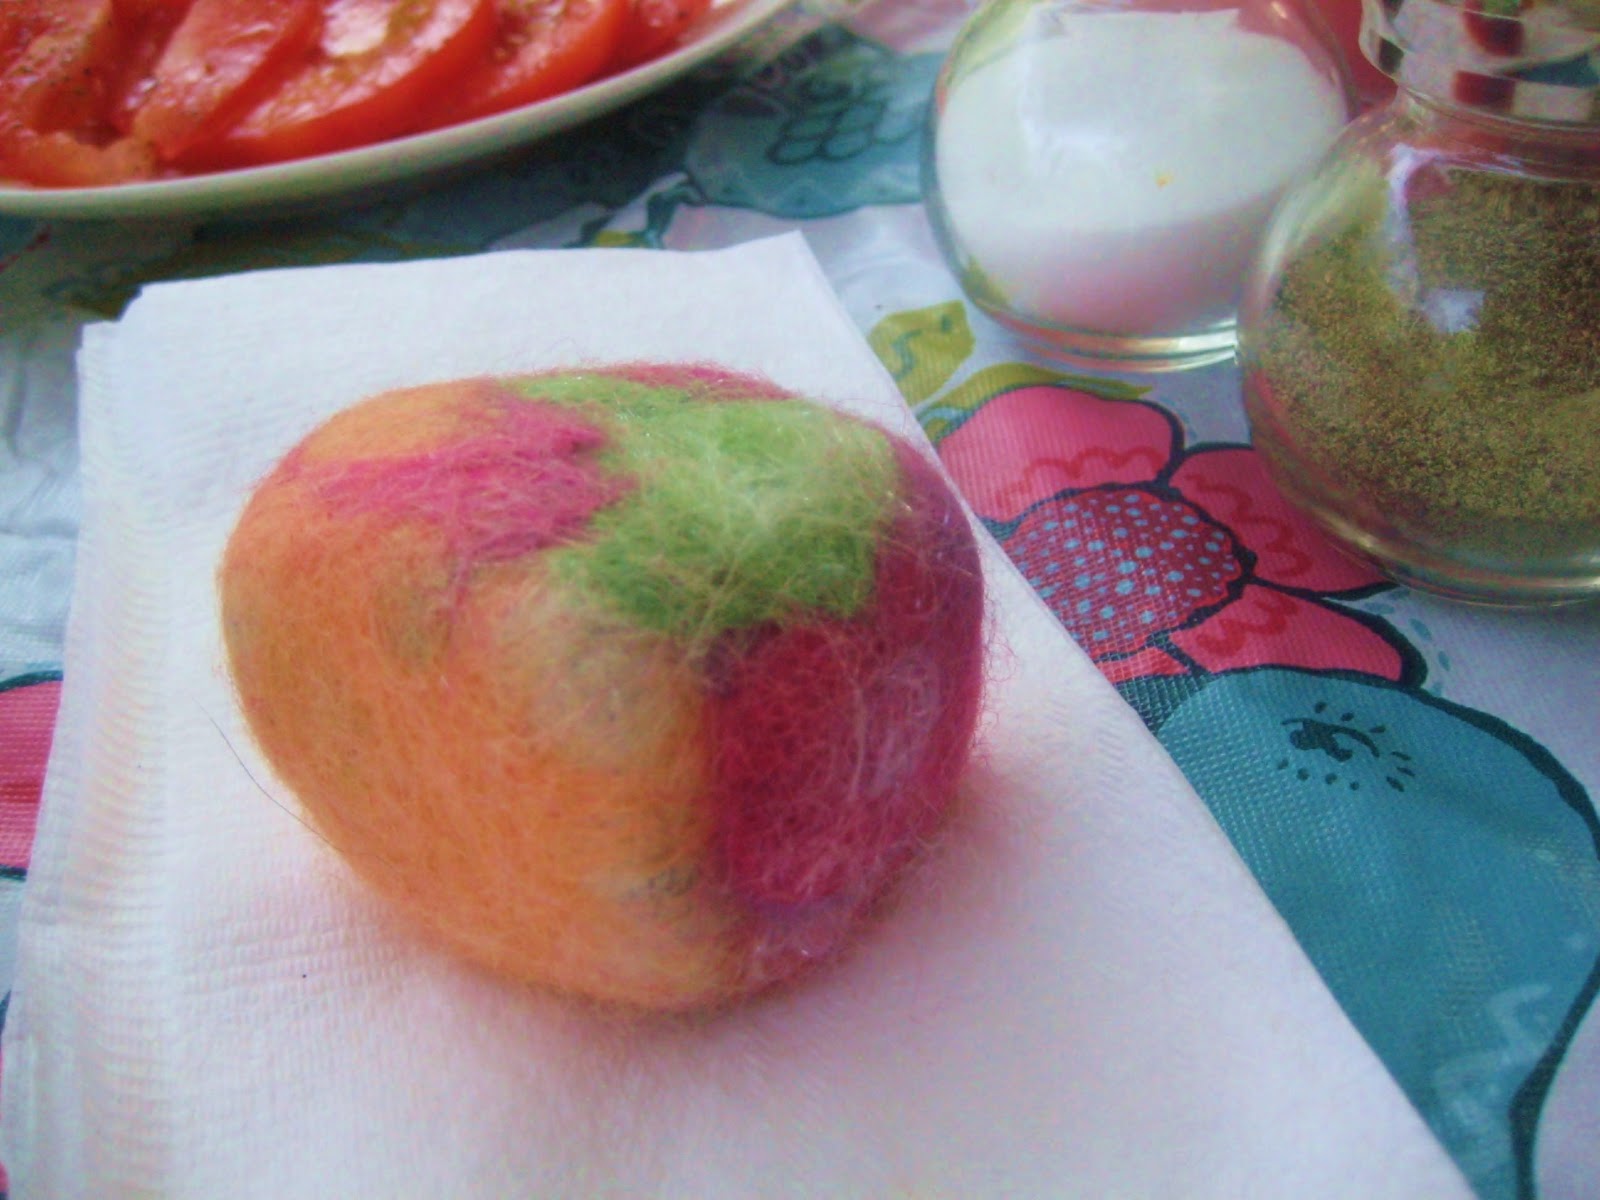

They are pretty fun to make and Michael's craft store recently started selling wool roving. Although you will get a better selection of colors on line or if you are lucky enough to live near a store like New England Felting in Massachusetts.  Wool and sheep shows are also a great source.


The small rocks are easy for little kids to felt.  There are plenty of YouTube videos on how to wet felt.  With kids I would help them layout the felt and wrap around the rock. Several layers are necessary to get good coverage.  Place rock wrapped in felt into a knee high pantie hose. Tie off pantie hose and then have them start the felting process.


You can see the smaller rock needs to be felted better. Depending on the age and attention span of your child you may end up with some partially felted rocks.  No worries.  You can always have them go back and continue felting another time. Just add soap, warm water and continue rubbing.

Have fun crafting with your kids!

Fancy Valentine Pencils


It is so easy to add a little ooh la la to a holiday pencil! All you need is a pack of holiday pencils, a feather boa* from the craft or party store, a glue gun and some craft gems (optional.)

*Make sure you use the fuzzier boa style not the long feather kind.


Wrap the boa around your pencil 2x loosely - cut. This will be your measurement. Before you cut the whole boa up glue down using hot glue to see if you like the look. Adjust the measurement to your liking.  I placed glue just under the metal eraser collar then took one end of the boa and held it down until secure.  Next wrap the rest of the boa bit around 2x loosely - glue end in place.

I made 14 pencils with one boa.


Optional: glue a gem on eraser. My daughter felt this made it extra fancy!


Perfect for any holiday, birthday party favor, Fancy Nancy themed party...

XOXO Mama King


Pin It

Homemade Holidays: Ornament Crazy!


I have been a bit obsessed with needle felting these last few weeks. I have been making 100% wool ornaments by repeatedly sticking a special needle into the wool.  I begin by making the ball then I freehand the design onto the ball. There is something so relaxing and creative about the process. I am just a beginner so I would recommend checking out the web for instructions.

I love the scarf!

I still need to add the olive branch.

My girls really like this one.

I added beads to this one. My friends daughter taught me how to do it!

This last ornament is a project I am going to do with my Daisy Troop.  I just became a co-leader. The girls are earning their center patch. The ornament represents the patch and learning their pledge.

Homemade Holiday Gifts: Bath Bombs


I am already thinking of teachers gifts for the Holidays.  I have always wanted to try making bath bombs.  I finally wrangled up all the ingredients* and followed the instructions on Instructables.  


It couldn't have worked any better. I had no problems. It was very straight forward. The girls could do the measuring/pouring.


I tried two types of molds. Both worked beautifully. The bombs came out easily.


*Citric Acid was difficult to locate. I could not find it at my grocery store or pharmacy like recommended on line.  I ended up finding it at a health food store. It was a bit pricey. One 4 oz. bottle was almost $6.00. You use the entire 4 oz. in the recipe. If you were more patient you could order it online I am sure for less.

Overall, a fun project! I definitely recommend it. We used grapefruit essential oil for our scent (make sure you get the kind meant for use on the body.) The house smells wonderful!

Halloween: Girly & Spooky


I love making hair bows for my girls, especially for all the holidays. There are hundreds of bow tutorials out there in the blog world. It really is easy!  Find some cute ribbon (Halloween ribbon is on sale now!) and go to town.  I had extra plastic spiders left over from some goody bags I made for our neighborhood pumpkin carving party.


So cute! Spooky and girly...


Lu wasn't completely sold on the spider. I had to explain to her Halloween is suppose to be spooky. Luckily little sister is fearless and convinced her it was OK.


Love that jelly face!

Don't forget to enter my giveaway! A year subscription to the brand new Disney FamilyFun Kids Magazine.

Simple Fall Inspired Crafts


If you are anything like me, you often find yourself telling yourself, "I could totally make that!" Yet, most of the time you never quite get around to making said item.  Well, these projects pictured above, I found on a recent shopping trip, are too simple not to make! Don't you just love the matted seedpods? So simple and elegant.

Also, don't forget to enter me FamilyFun Kids Magazine Subscribtion contest. Just leave me a comment here!


Easy Halloween Silhouette Craft


Yes, it is August. I know. I can't help it when ideas pop into this crazy old brain of mine. Think of it this way, you have plenty of time to make these for you and your extended family! It is sooooo easy.

Take a profile photo of your little ghoul, goblin or witch wearing a distinct Halloweenie (hee-hee) prop. Print out on regular printer paper. I did mine 8x10.


Glue picture onto black construction paper with a glue stick. Do not use regular wet glue. It will wrinkle the paper. Use the glue stick sparingly. It really is meant to prevent the paper from moving while your cutting. It doesn't need to be cemented on.


Using your (good=sharp) scissors and cut out your picture.
Once you've cut out your picture, flip paper over to reveal the black construction paper silhouette.
Mount. I used a painting of Em's as the background.


So cute! I am trying to hunt down the cat for his silhouette. Maybe harder than I think!

Seriously this is soooo easy. No tracing involved. Just remember you end up with your picture reversed - so plan accordingly. I am also thinking this would be so cool covered in black fine glitter. Have fun! Let me know if you come up with some creative props.

My New Obsession...


Alright, I am going to come clean. I am a bit obsessive. I will find something I love and it will take over my life to the detriment of everything else. It can be a craft, a tv show, a book, puzzles, a food... Luckily these obessions are short lived and I can move on until my next craze. My past obsessions have included, intricate tissue paper collages (my kitchen table was covered with tiny bits of tissue paper for weeks), the TV series Bones (I discovered it in season 5 so catching up became well...), Suduko (I would burn through Suduko books like crazy), Hurricane Popcorn (I ate so much I can't even look at it now!), and of course, blogging (we all know how that turned out.) The list goes on and on. My newest obsession is wet felting. I am a felting maniac! I just find it so creative and relaxing.

Here is my latest creation.


I created a long panel of felt. Cut it into three strips, keeping one end attached, and then braided them to create the base of my band.  The nice thing about braiding the band is that it provides a bit of stretch to the band. I then sewed on several flowers that I made out of the salvage felt and added some tulle. I know something is a hit with my kids when they start fighting over it ;-)


Wet Felting


My knitting group learned how to wet felt this past week. We turned this gorgeous roving into felt sheets.

More Fairy Crowns


I bought a package of elastic headbands on clearance, $1.00 for 6 headbands. They are perfect for making fairy crowns. Continue reading to see how I made this.

Repurpose Melissa & Doug Wooden Tray


We really like Melissa & Doug products but don't you find it a bit frustrating that they come packaged in these lovely wooden trays with NO TOPS! It makes the tray completely useless. I end up storing the pieces in old baby wipes containers.

So ever the craft pack rat I hold onto them imagining I will someday decoupage them into pretty picture frames/shadow boxes. Well, that day just isn't going to happen. 

When the girls got their recent M&D Wooden Dress Up Dolls for Christmas from Grammy I grabbed my glue gun and BAM, 5 minutes later I had a display shelf for all of Lu's tiny treasures (fairies, squinkies, shells...) I will hang it low so she can curate her collections as she sees fit.

I simply glue gunned the ribbon to the back and then fearful it wasn't strong enough added extra strong packing taped on top. I then glue gunned a shim (which is a thin piece of wood that is wider on one side then the other) to the bottom. This helped tip the boxes bottom back against the wall so the items would not fall out so easily.

Elegant (Last Minute!) Advent Calendar


I taped up some glittered chipboard letters spelling out "We Wish You A Merry Christmas." Exactly 24 letters! I bought 2 boxes of glittered snowflakes from Walgreen's on the cheap. 

Notice I have conveniently cropped out our dining room table that is overflowing with a jumble of craft supplies, Thanksgiving school projects, and Christmas decorations. If you look in the bottom picture you can see the silhouette of Lu's pretzel rod tepee! Word is they are making pretzel rod advent wreaths in Sunday School this Sunday. Who knew you could make so many seasonal crafts with pretzel rods. This coming from the lady that constantly finds new uses for toilet paper tubes ;-)


I tapped in some straight pins under the letters. Each day the girls will hang up a snowflake. My kids know that when we get to the word "Christmas" we will be close to actual Christmas.

I think it looks very elegant and understated. I'm not sure if glittery letters and glittery snowflakes could be called understated? In our house the fact that they are all one color makes them understated! I have to admit I was looking for red glittery chipboard letters. Fortunately for us they only had silver at Michael's.

Fairy Wings for Annie


Annie is Lu's Lovey. Annie is dressed up, danced with, read stories to and snuggled up to every night. Lu gets teary eyed everytime Annie gets put in the washer.  I say a silent prayer every time I reach in to the dryer to retrieve her, fearful for the day when Annie doesn't make it out in one piece. Annie after all is Lu's first love. A cat this special deserves her own set of Fairy Wings.

Supplies: 18 gauge wire, duct tape, old tights or stockings, elastic, glue, and glitter


Bend wire in half. Create flattened heart shape. Repeat.


Tape wire overlap ends together with heavy duty tape,


Measure length of elastic banding around doll/animal. Cut and knot into loop.

Cut legs of tights. I used infant tights. 
Slide wing into leg of tight.  Pull tight.
Tie tightly together. 
Place elastic loop into center of knot. Tie once more tightly.
Reshape wings.


Decorate with glue and glitter.


Let dry. Tap off excess glitter.


Tadaa!

LinkWithin

LinkWithin Related Stories Widget for Blogs